Saturday, September 28, 2013

Manual Mode

This past week, we reviewed all the different settings and modes before finally covering Manual.  I completely understand why she selected manual settings to go over last because it is the hardest.  She uses manual only, but for someone who has depended on the other settings most of the time.  It can be challenging.  It can be done, but takes a lot of patience.

Once you select the desired shutter speed and aperture, you depend on your light meter to tell you if you have the right amount light.  She even showed us the +/- icon to adjust your exposure to accomplish your art.  If adjusting the shutter, aperture and exposure doesn't work, be sure to look at the ISO setting.  Remember to use all the ISO you need and no more because it will affect your pixels.

Knowing that manual will be a challenge, I've been practicing this weekend.  To be honest, I did end up with some dark photos.  I would have to take it again and practice getting the lighting just right.  Especially in a house like mine because I don't have enough lighting in order to take photo inside the house.   The manual does work great with moving lighted objects.

This week's homework was a questionnaire that my instructor handed out to the class.  Once we answered the questions, she requested that we take pictures of our answers.  No pressure!  On top of our 5 questions, we have to hand in 5 additional photos.  Just random photos, nothing special.  Below is the answers to my questions and my 5 additional photos.  Enjoy!

1. If you could have any kind of "life's work", what would it be?

   photo TravelAroundtheWorld_zps60f094aa.jpg 
In manual mode

I would like to travel around the world and taking photographs of different cultures, landscapes and God's beauty.

2. If you could live "anywhere" . . . where would you go?

   photo DSC_0507_zps1ec5765b.jpg 
Shutter speed mode

I would live on a golf course

3. If you could take up a hobby, what would you do?

   photo DSC_0510_zps95352130.jpg
Manual Mode

I would take up sewing.  I use to know how to sew, but it's been since high school.  Right now, I'm doing it the old fashion way . . . by hand.  

4. If you could "own" one thing of enormous wealth what would it be?

   photo DSC_0477_zps70624cc5.jpg
Manual Mode

I would like to own gems 

5. Name one thing that you are proud to leave behind.

   photo DSC_0540_zps618dfca3.jpg
Aperture Mode

My children 

My additional 5 photos: 

I've been slowly decorating for autumn. The first two photographs, I took manually. I so proud of myself. I have to confess that it took probably 2-4 photos before I found the best lighting. LOL!
   photo DSC_0526_zps8bb5cf3b.jpg photo DSC_0516_zps875c847b.jpg 
Manual Mode

In this picture, I have a working witch's cauldron. Actually it's lights shining on wind blowing on white material. LOL! I love the lighting. Now that Halloween is quickly approaching, I will be taking a lot more evening photos. I love the lights.

   photo DSC_0490_zpse03d32b5.jpg
Aperture Mode
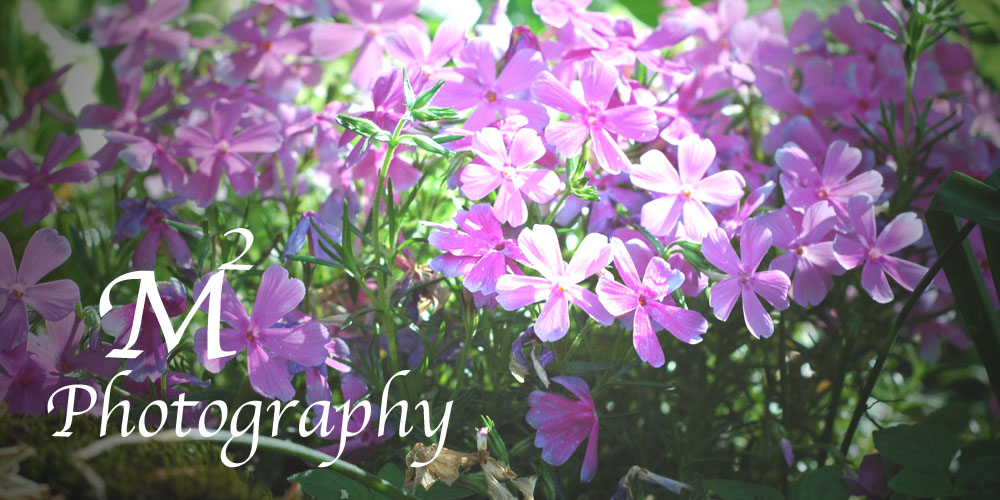
Beautiful autumn flowers

   photo DSC_0488_zpsa66e0c54.jpg
Aperture Mode 
My lil' pumpkin! 

   photo DSC_0484_zps780b2839.jpg 
Aperture Mode
 Autumn Harvest Time

Thursday, September 19, 2013

Written Word

This week, we finished going over shutter speeds and aperture settings.  The light meter decides what number (shutter speed and aperture) is needed to take the picture.  If you hear the beeping, it is your light meter adjusting based on the amount of light reflected back.

Aperture - In order to allow more blur you must use a longer lens.  Aperture settings are great to the blurred background and a little in the foreground.  This is what you'll need to make portrait pictures.

ISO (International Standard Organization) controls the speed of the light, the higher the number the more sensitive.  The lower the number, the less sensitive.  Set ISO high for low light situations.  High ISO used for dark (weddings or dark outside).  Low ISO used for beach scenes at noon because there is too much light.  The higher the ISO number, the more grain will show especially in dark.  Take all the ISO you need, but not one stop more (between 200-400 normally).  The less ISO, the less grain in your photos.

Note

  • Open sky (full sun) - 100-200
  • Open shade - 400
  • Need help with low light set ISO at a high number
Mode Dial  - (Creative and Image Zones)
Image Zone  - Portrait Mode - When taking a portrait, blur the background.  You want to focus the subject.  Warning it affects the light especially if your on the beach must have low light (lowest F/stop and high shutter speed). 

Landscape - When doing a scene camera will not blur - it will be sharp.  Will set high F/stop and shutter speed.  

Macro/Close-up Mode - 2 or 3 feet - coming in close and will blur some, but will sharp as well.  

Sports Mode - Motion setting highest shutter speed.  For instance, a child running or fast car driving by.  It doesn't mean that it can only be a sport.  

Night Portrait - Theresa recommends using at night or in dark lighting.  The flash pops up and brightens the subject, but shutter speed will drag out to grab the surrounding lighting.  Is great inside a church with stain glass windows.  Also great for the sunset portrait or street lights.  You can use this setting as an action as well.  The flash will fire at 125 shutter speed.  The flash is only good for 5 feet.  The flash will light the subject, but also lights up the lighted movement in the background.  For instance, have someone pose in front of street lights with cars moving in the background.  Theresa wants me to try this next time.  

Moon shot - try to set camera: F/5.6  1/320   ISO-100

Panning
A lot of moving objects - camera to eye and follow and continue mashing the button half way and when subject is in front, mash button right in front and continue mashing half way as the subject goes by.  

My homework this week is to create photos with verses, quotes or poems that I feel go along together.  Below are a few I did: 
 photo Autumn_zps408448de.jpg

 photo Laughter_zpsd9274233.jpg

 photo Woodduck1_zpsa9662f98.jpg

 photo Miletogo_zpsb4f459c4.jpg  photo BendingCattails_zpse361582f.jpg

 photo Faithis_zps6a738881.jpg

Next week, we are suppose to work with manual.  Theresa said from next week and on out, our classes will be a little more challenging.  

Saturday, September 14, 2013

Life In Motion

This week, we went over shutter speeds and aperture settings.  I am loving my classes and learning so much.  I am anticipating new techniques Ms. Theresa will reveal to us the next class session.

To Remember: the higher the shutter speed setting, the subject will be stopped.  The lower the setting, more the subject is in motion and the photo will be blurred.  You must decide what you want to show the audience before you even press the button.  Do you want the action in motion or stopped?

The lower the aperture setting, the fore/background will be blurred.  The higher the setting, the sharper the fore/background.

Shutter speed and aperture work together to give you the best photo.  If your aperture setting is low, you must need a high set shutter speed.  The aperture hole will be small thus, allowing less light.  If you force the shutter speed too low, you might end up with a very dark photo and vice versa.  I've noticed with my Nikon D70, if I want a low shutter speed the aperture or F/stop will show Lo/Hi instead of the number.  This tells me there is either too much light pouring in or not enough.  Listen to your camera!  I deliberately took some pictures that the aperture was too low or too high and sure enough the picture was either over exposed or under.  I love my camera and I know it is wanting to help make the best picture as possible, but like Ms. Theresa said, it can want to help you out a little too much and that is why we don't want to go around the world taking pictures with the automatic button set.  LOL!

I am an artist!   If you see me with my camera and tripod in hand, be at ease that I'm working on my art.  :)

 photo DSC_0155_zpsb029f133.jpg
It's hard taking a picture of a bumble bee!  It took me a long time and loads of patience to capture this bee buzzing from flower to flower.  Bees just won't stay on a flower long enough to get all of your settings and focus ready.  The bee was just moving from this flower to another, when I took the picture.  You'll notice that the flower has a slight blur and that's because the big bee moved it.  


 photo DSC_0153_zpsee365db4.jpg
I actually took this picture looking up.  I love how the beautiful blue Alabama sky was in the background, giving this shot lots of vibrant color.  


 photo DSC_0152_zpse5969684.jpg
This picture was actually an accident.  I was trying to catch a bumble bee buzzing around the flowers.  I didn't get the bee in the shot because he flew off so fast, but I love the warm sun's light reflecting off of this flower.  


 photo DSC_0143_zps8152f696.jpg
This is an aperture or F/stop photo that I took of these beautiful flowers.  Notice the blur in the background. Just beautiful! 


 photo DSC_0142_zps8ba889b6.jpg
Pathway under an arbor into the park's wildflower garden


 photo DSC_0140_zps8d8db25c.jpg
Cheerful light green baby fern springing up in the forest along the garden pathway.  I wanted to show you the vibrant green color by using the white balance.  So pretty!

 photo DSC_0139_zps87e80810.jpg
I love how this picture came out.  Again, I used white balance setting in order to bring these flowers to life.

 photo DSC_0138_zps5840c7d1.jpg
I spotted this brilliant red flower in the forest by a creek bank.

 photo DSC_0131_zpsab09eb78.jpg
Reminds me that Autumn is right around the corner

 photo DSC_0128_zps68d23642.jpg 
Butterfly flitting around enjoying a cool autumn day

 photo DSC_0125_zpsf3a06366.jpg
Took advantage of a slight wind, moving this grass.  Notice the slight blur, the plumes look more like feathers.  Allowing more light. It was hard to capture the movement in this picture because it was so bright outside, I couldn't set my speed too low.  

 photo DSC_0123_zps50626aa3.jpg
Shutter speed is a little faster than the photo above.  Notice this picture is a little sharper than above.  

 photo DSC_0110_zps0c5ee25c.jpg
An example of pushing your aperture settings when making your shutter speed real slow.  Shutter speed at 20 and F/25, allowing too much light and causing over exposed photo. 

 photo DSC_0105_zpsf763c4ee.jpg
Shutter speed isn't set on 30 because it would cause too much light, but it's just enough light and still have the slight blur of motion.  I think this turned out good.  

 photo DSC_0103_zpsc1c3abaa.jpg  photo DSC_0098_zpse9807e94.jpg
These two pictures would have to be one of my favorite motion pictures.  On the left: night time lite church.  I used the long exposure setting for this picture.  I love the sparkle from the street lights.  On the right: city scape of my downtown.  I think it turned out very good because you see the movement from the cars, coming and going.  The street lights and signs are still.  A couple street lights even have a little sparkle.  

 photo DSC_0076_zps1f16ca67.jpg
Fair grounds - the ferris wheel was going entirely too slow and where I was taking this picture required a lot of patience from other drivers.  Yikes!  I felt like I couldn't make my exposure too long.  

 photo DSC_0068_zps828dc64b.jpg

 photo DSC_0063_zps12c899d7.jpg
The above two pictures taken at a long exposure and turned out great.  Shutter speeds are awesome! 

 photo DSC_0013_zps83181a89.jpg  photo DSC_0011_zps22e63d6b.jpg
My past class meeting, my instructor really liked my fountain photo.  She challenged me to go back and take two separate photos to see the difference.  It really does give you an entirely different picture.  On the left: I slowed the shutter speed and you can see the continuous flow of water, but notice the lighting and the sharp background.  Whereas the right, the water is slow motion.  The photo is darker because less light is allowed in the camera and the aperture is blurred in the background.  


Wednesday, September 4, 2013

My First Digital Photography Class

This week, I started my new adventure.  I finally took that large step, a leap of faith if you will.  I've been wanting to follow my heart and passion for the art of photography.  My goal is to take four classes and be able to finish in a year.  Right now, I'm taking Introduction to Digital Photography.  Next Trimester is Advanced Photography.  Spring offers the Adobe Photoshop Elements classes, which is where the creativity comes into play.  I think I'm going to love my instructor, I guess I had better because we will be seeing each other for a whole year.  After class, Ms. Theresa and I got to talking about shadowing and lighting.  She feels just from talking to me about my issues that a lot of my problems are going to be with lighting.  This is something that can easily be fixed.  I have to find out where I am and what my goals need to be by the end of these 6 weeks.

This week, we skimmed over the history of photography.  Ms. Theresa told us that the first hour will be the lecture time and the second hour will be critique session.  During our critique session, we all broke up into small groups and looked over the photographs that our instructor passed out.  She gave us 6 photographs and we had one person to write down words that describe "what we feel" about each one. Then, we had to describe why we felt that way.  Is it because of the lighting, shutter speed or both that moved me?  Our instructor would not bat an eye pointing you out and asking you "what moved you?" in a picture.  She wants us to look deep and hard at the creativity, which does include the lighting and shutter speed.

Today, when I took a few pictures I wanted to focus on the lighting issue.  How lighting can affect the emotion of a photograph.  I took pictures of the same building at the same time of day, but at different angles in order to see the various lighting can affect the picture.  Very interesting, how the angle of the sun can make a subject different.  All the photos were taken in the early morning light (8AM).

 photo DSC_0472_zps1d893927.jpg  photo DSC_0462_zpsec1f7faf.jpg
Above left: direct sunlight at the backside of the church; right: front of the church with the sun shining from the right side, causing a silhouette.  I actually appreciate the right photograph more than the left because it focuses on the crosses, which is exactly what I wanted to show.  I also love the puffy clouds in the background.  It's a sense of God's glorious peace within.  The left reflects the golden crosses, but your eyes also wander over the entire building and not just the crosses.

I would like to achieve an evening sunset silhouette.

 photo DSC_0468_zps1b2f2e55.jpg  photo DSC_0467_zpsb0ea5cd0.jpg
Above left: is the right side of the church, in direct sunlight; right: is the left side of the church, with the sun shining from the right.  I actually appreciate the right photograph better because it gives emotion.  A sense of tranquility and warmth, where the left picture doesn't give that emotion.  I think it is because of the lighting, which includes a little casting of shadows.

 photo DSC_0466_zps6ba3f433.jpg  photo DSC_0451_zps0adb1294.jpg
Above left: beautiful red knock-out roses in direct morning sunlight; right: my action shutter speed of a water fountain at a local park.  I love this picture because of the movement.  The emotion I feel is refreshing, delicate and tranquil on a hot summer day.

Next week, we will go over shutter speed, aperture and F-spot.  I've been using my camera manually for over two years, so I've had a chance to play with all the shutter speeds.  I have a Nikon, which is very different from Canon.  A lot of the settings are automatic like the F-spots.  Today, I went over using the modes (P, S, A, and M).  I never use these shutter speeds because it's not what I'm looking for in a photograph. I also messed a little with ISO settings, which controls the shutter speed.  It just takes a lot of patience and  practice, practice, practice.

Hopefully with time, I will achieve these goals.  Thank you for reading and viewing my photos.  More to come at another time.

At The Bayou

Family Photos at The Bayou in Monroe, LA

 photo DSC_0410_edited-1_zps905bbc4e.jpg
 photo DSC_0412_edited-1_zps2a341649.jpg  photo DSC_0404_edited-1_zpsc774c3f5.jpg  photo DSC_0400_edited-3_zps35409065.jpg  photo DSC_0384_edited-b_w_zps6508d3db.jpg  photo DSC_0387_edited-2_zpsb0b0432e.jpg  photo DSC_0414_edited-1_zps09293f51.jpg  photo DSC_0417_edited-2_zps41c4f5eb.jpg  photo DSC_0419_edited-2_zpsa1fe6646.jpg  photo DSC_0423_edited-2_zpsa4f04079.jpg  photo DSC_0424_edited-1_zps3f8b78b2.jpg  photo DSC_0428_edited-3_zpsfc0b2541.jpg  photo DSC_0433_edited-2_zps573f32ce.jpg  photo Alise2013_zps687b8bb2.jpg  photo Kids2013-edited1_zps01eca270.jpg

Photos taken M2 Photography using a Nikon D70 DSLR with additional flash and edited by Adobe Photoshop Elements.